To all teachers, students, and school administrators: We want you to know that our team at KI cares about you. We are deeply invested in the learning experience and want to help support world-class education environments at your schools and universities.
In fact, this is what KI is all about. We furnish knowledge to help you make smart furniture decisions. With trusted expertise, you can rely on us to guide you in creating spaces that support your current needs and easily adapt to fit future demands. Our years of experience make us the go-to resource in the industry for education.
Moreover, we understand you are ultimately the users of the education experience. And all throughout KI, we obsess over the user experience.
With this in mind, we are excited to share our classroom design tool called Classroom Planner. This free resource allows you to design education spaces exactly as you see fit. With unlimited design freedom, you can craft the architecture of your space and outfit it with furniture configurations that serve the unique needs of your learning environments. The tool captures the dimensions of the room and the distance between furniture and other fixtures to make space planning a pleasure.
Maximize your classroom layout with our new floorplanner tool by following the steps outlined below.
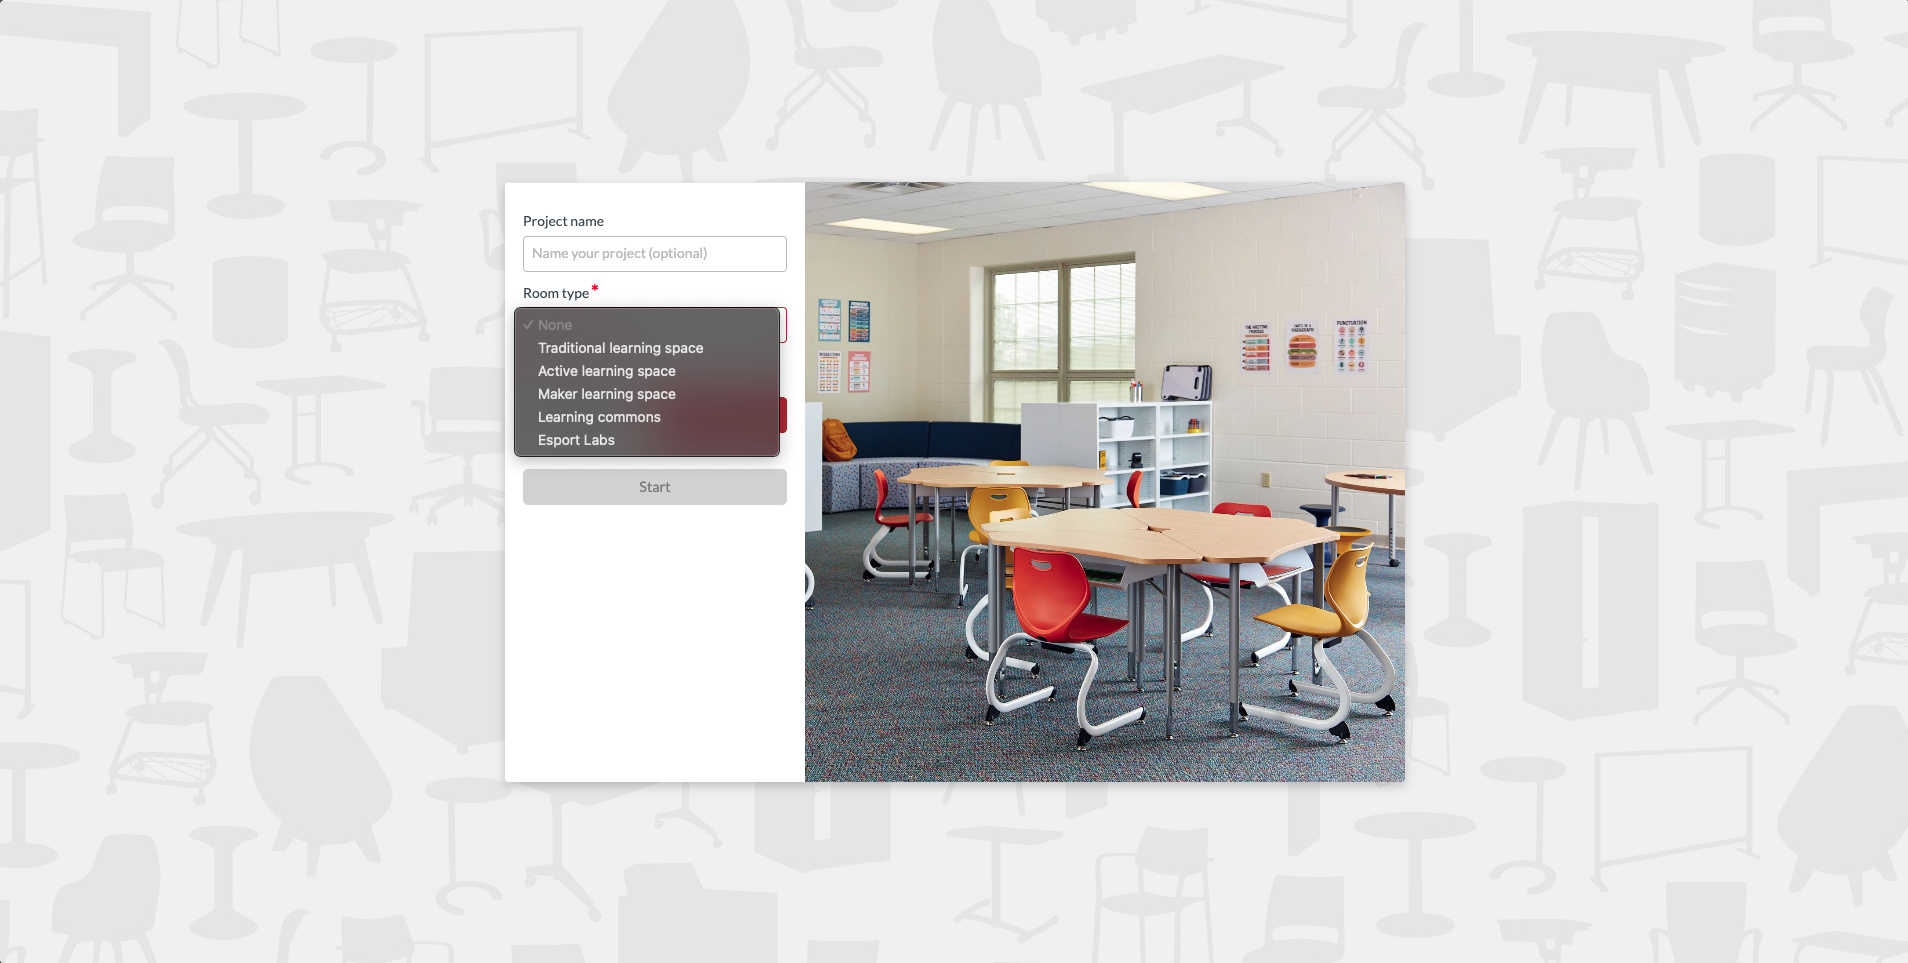
Step 1: Select Your Classroom Type
Launch the Classroom Planner and jump right in. This first step allows you to create different classroom layouts for effective learning in support of your unique needs.
- Choose your classroom type:
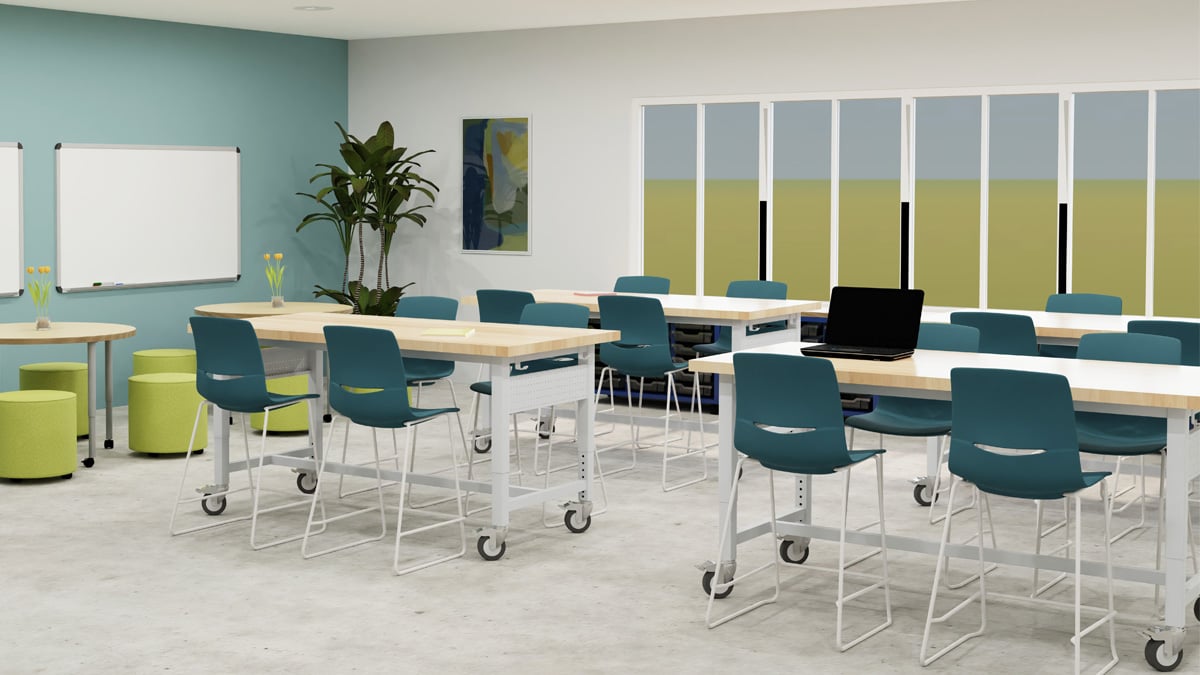
- Active learning space: These layouts feature flexible furniture that can be quickly reconfigured to support hands-on lessons, peer collaboration, or teacher-led discussions.
- Maker learning space: These layouts center around large worksurfaces and tools that encourage designing, building, tinkering, and creative problem-solving in groups.
- Traditional learning space: These layouts arrange desks and chairs in rows oriented toward the teacher, supporting focused attention and direct instruction.
- Learning commons: These layouts provide open, comfortable spaces with varied furniture that encourage independent study, informal collaboration, and group project work.
- Esports lab: These layouts integrate advanced technology, digital connectivity, and ergonomic setups that support competitive gaming, teamwork, and collaborative learning.
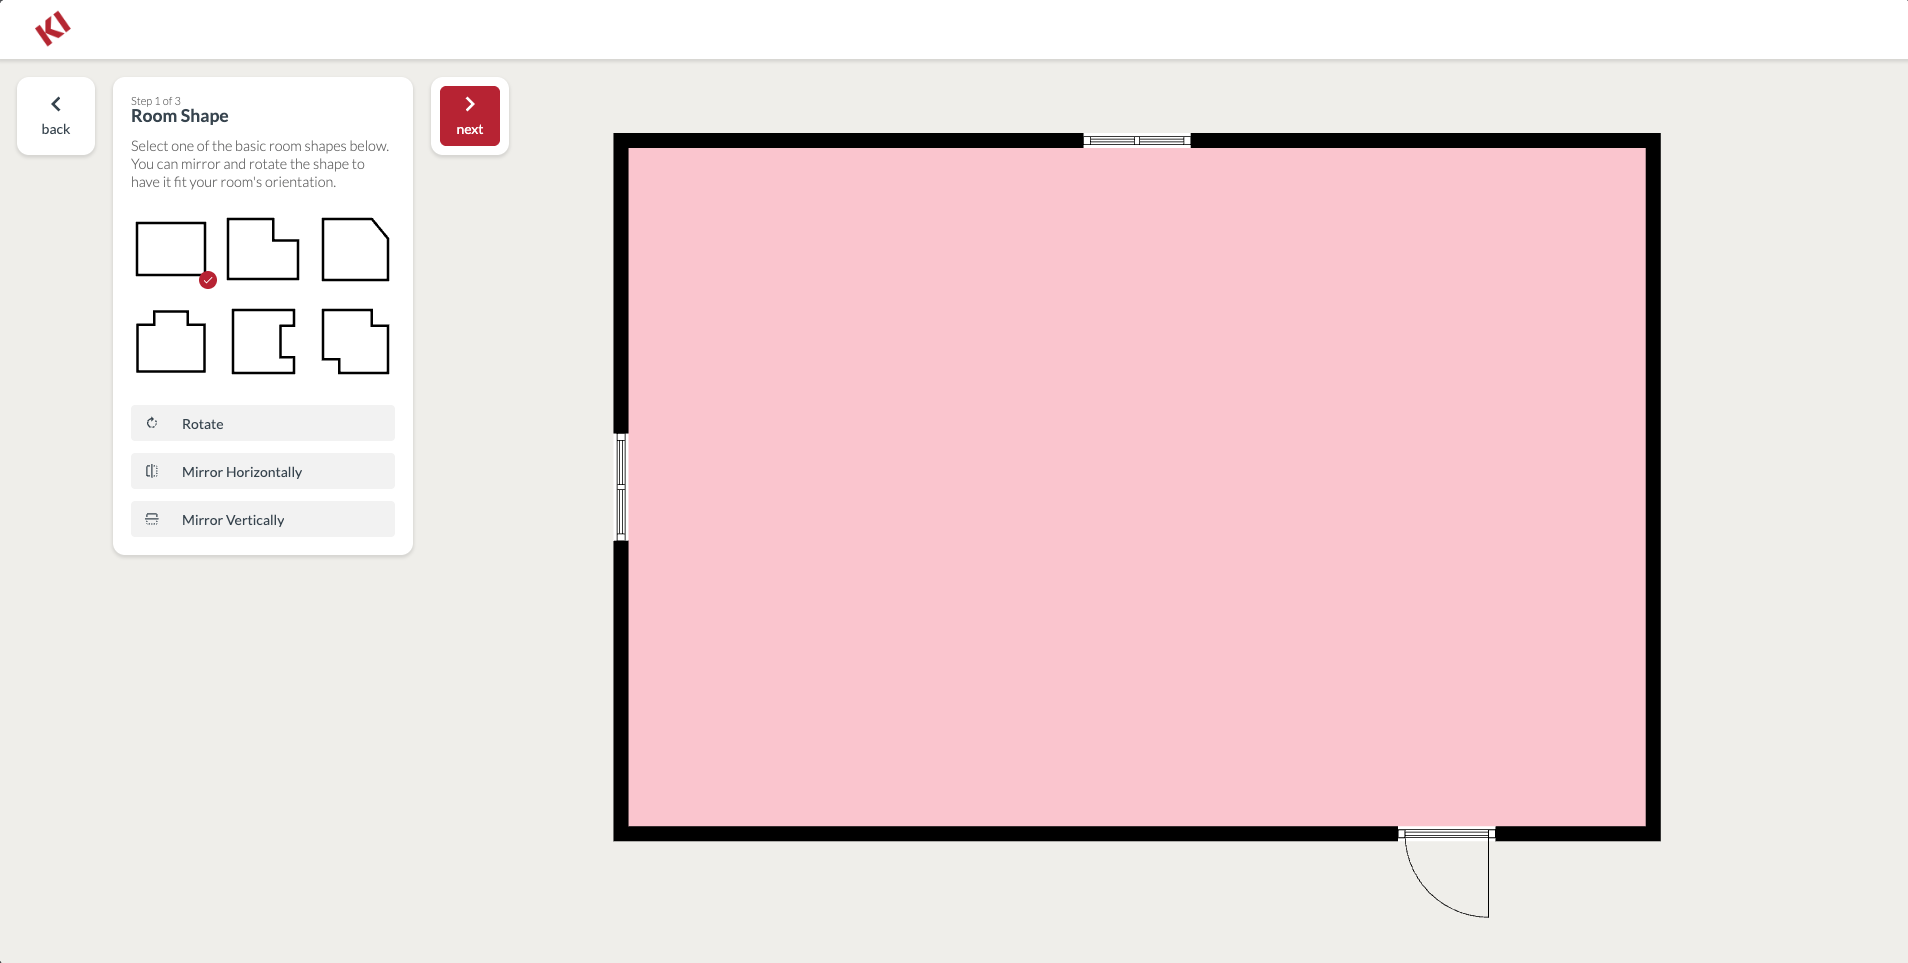
- Pick your room shape. In the classroom floorplan creator, you can draw, mirror, or rotate the layout of the room. Click and drag doors and windows to move them around and make your ideal classroom arrangement.
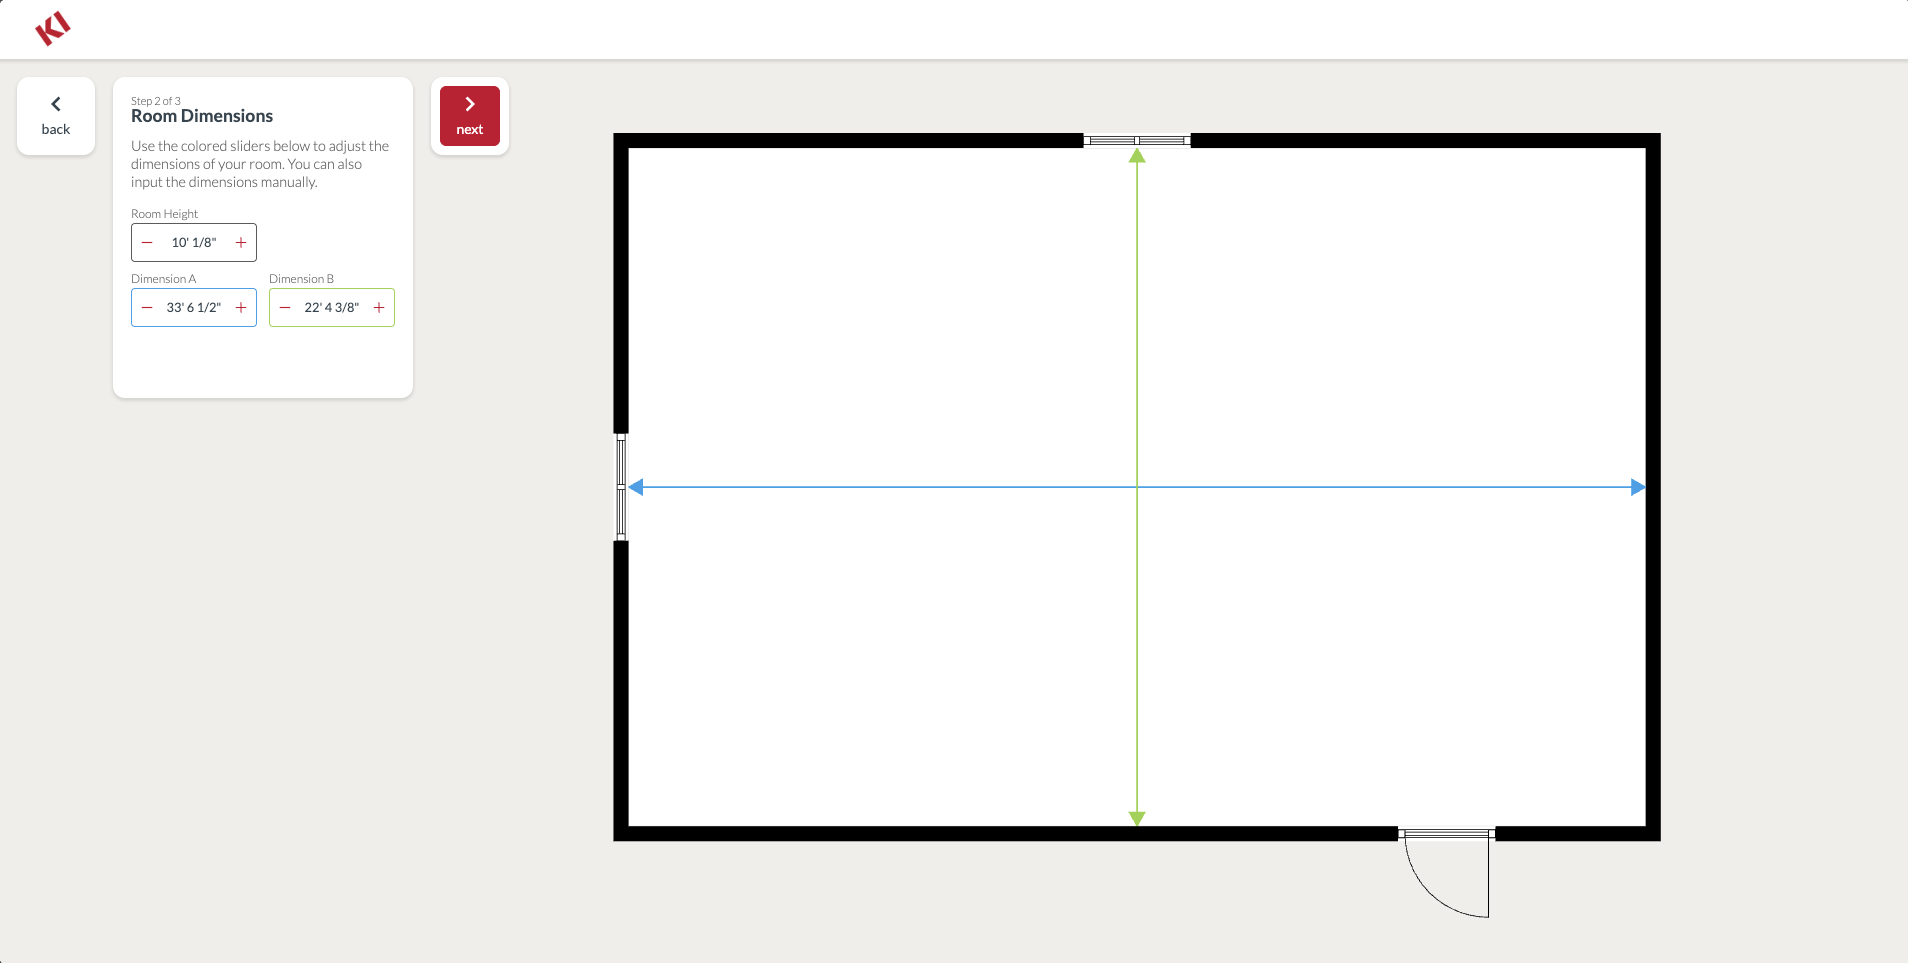
- Adjust your room. Add dimensions in feet or meters for room height, width, and depth.
- Select your room style. Based on the classroom type selected in step one, you’ll see several classroom layout maker options. Select among these to view idea starters with different classroom furniture arrangements.
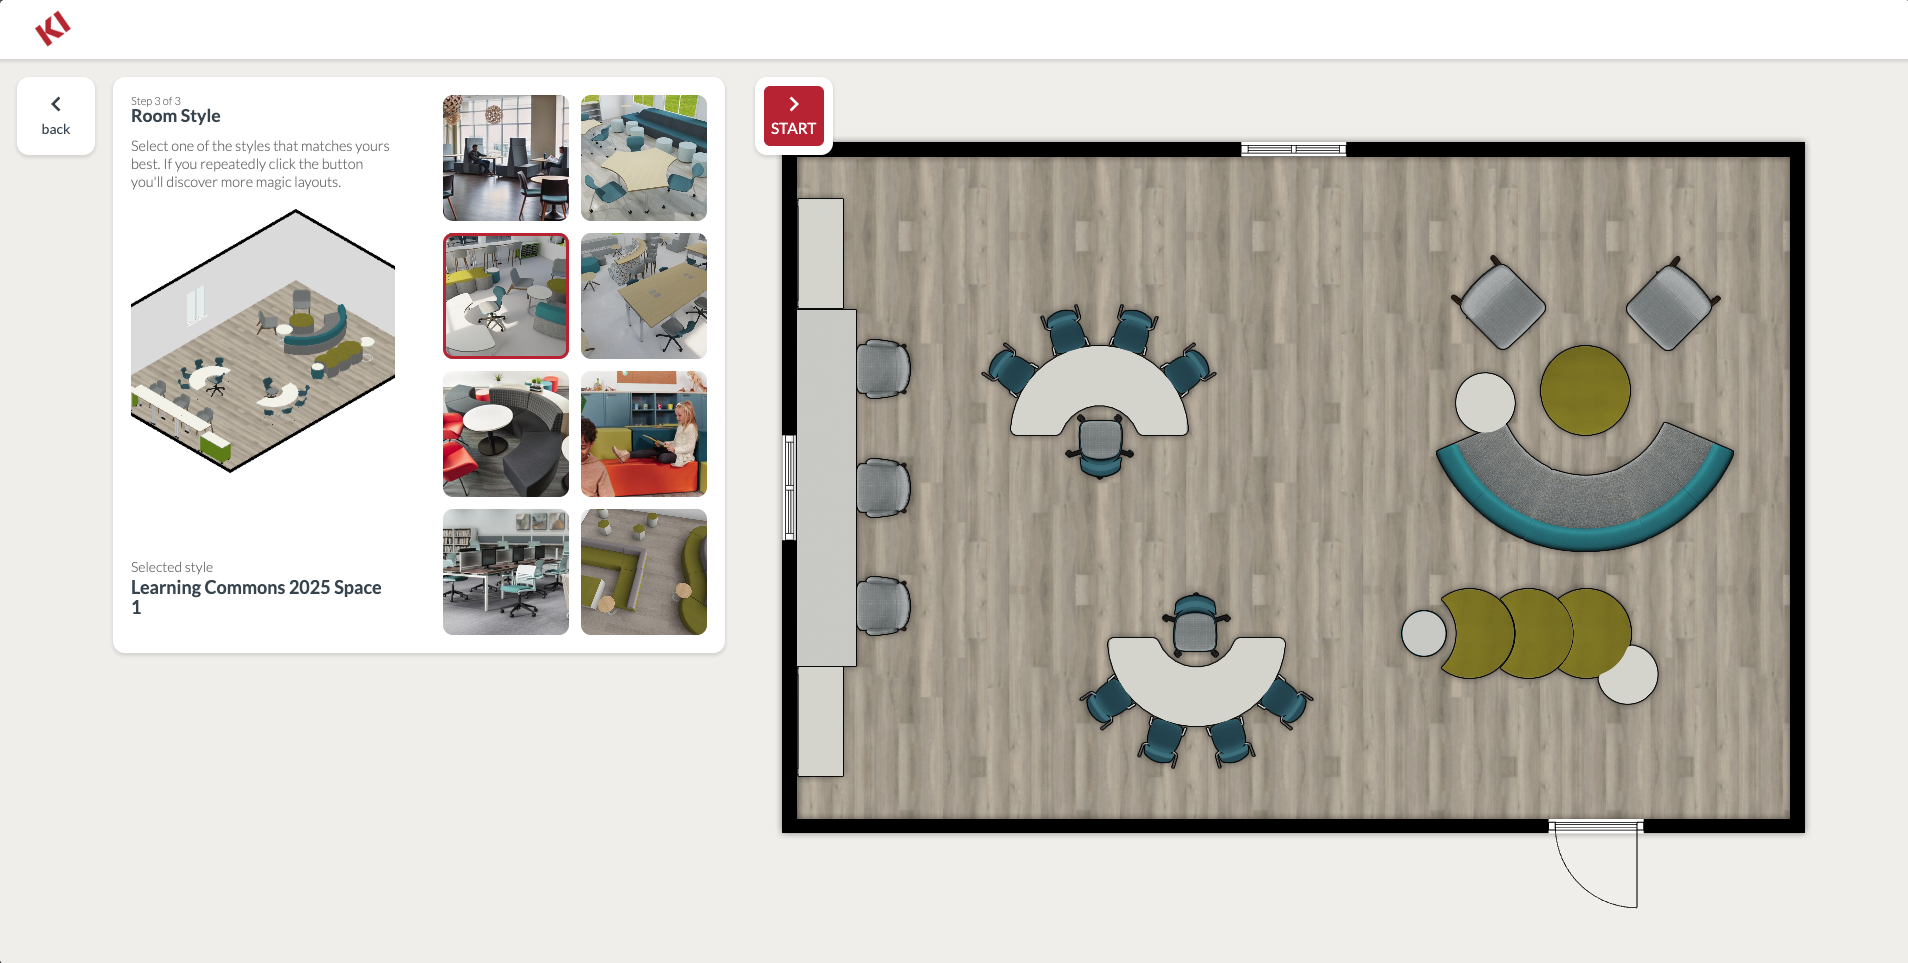
- Click start. Now the fun begins!
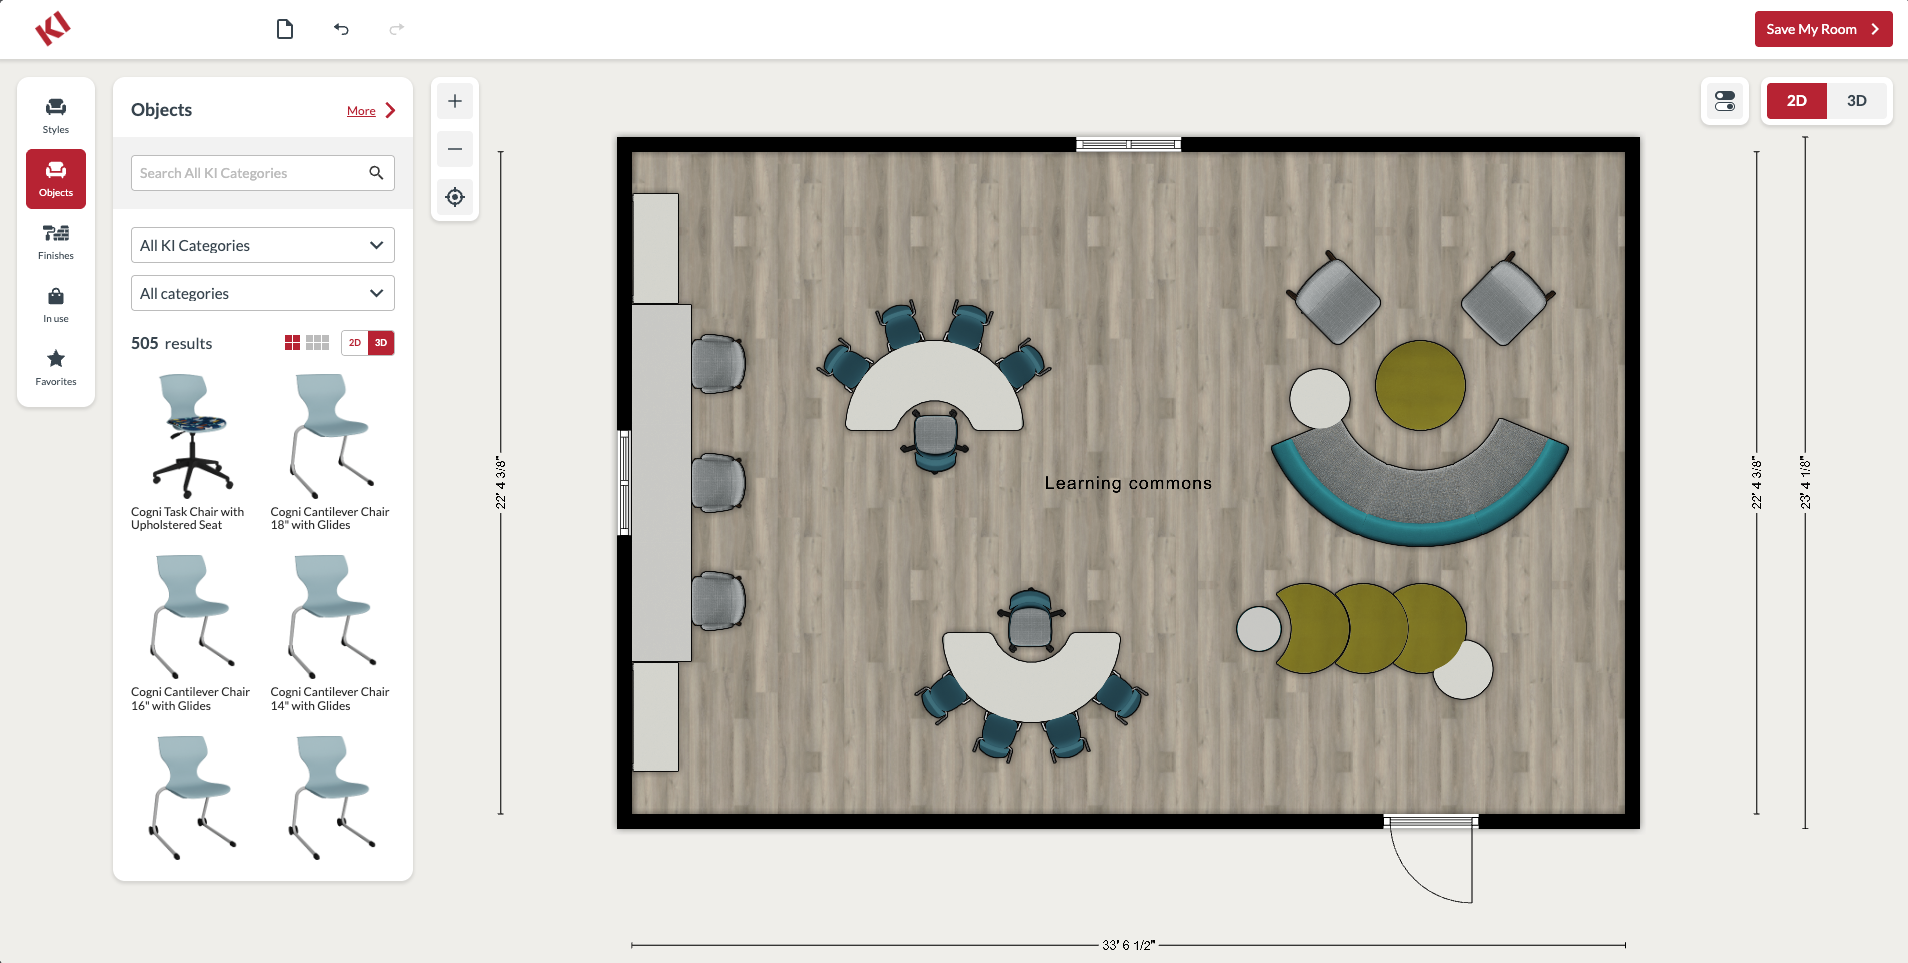
Step 2: Arrange Furniture, Walls, Carpet and Paint
Once you've created an initial floorplan, modify and customize it to your liking. Use these convenient tools to help refine your design:
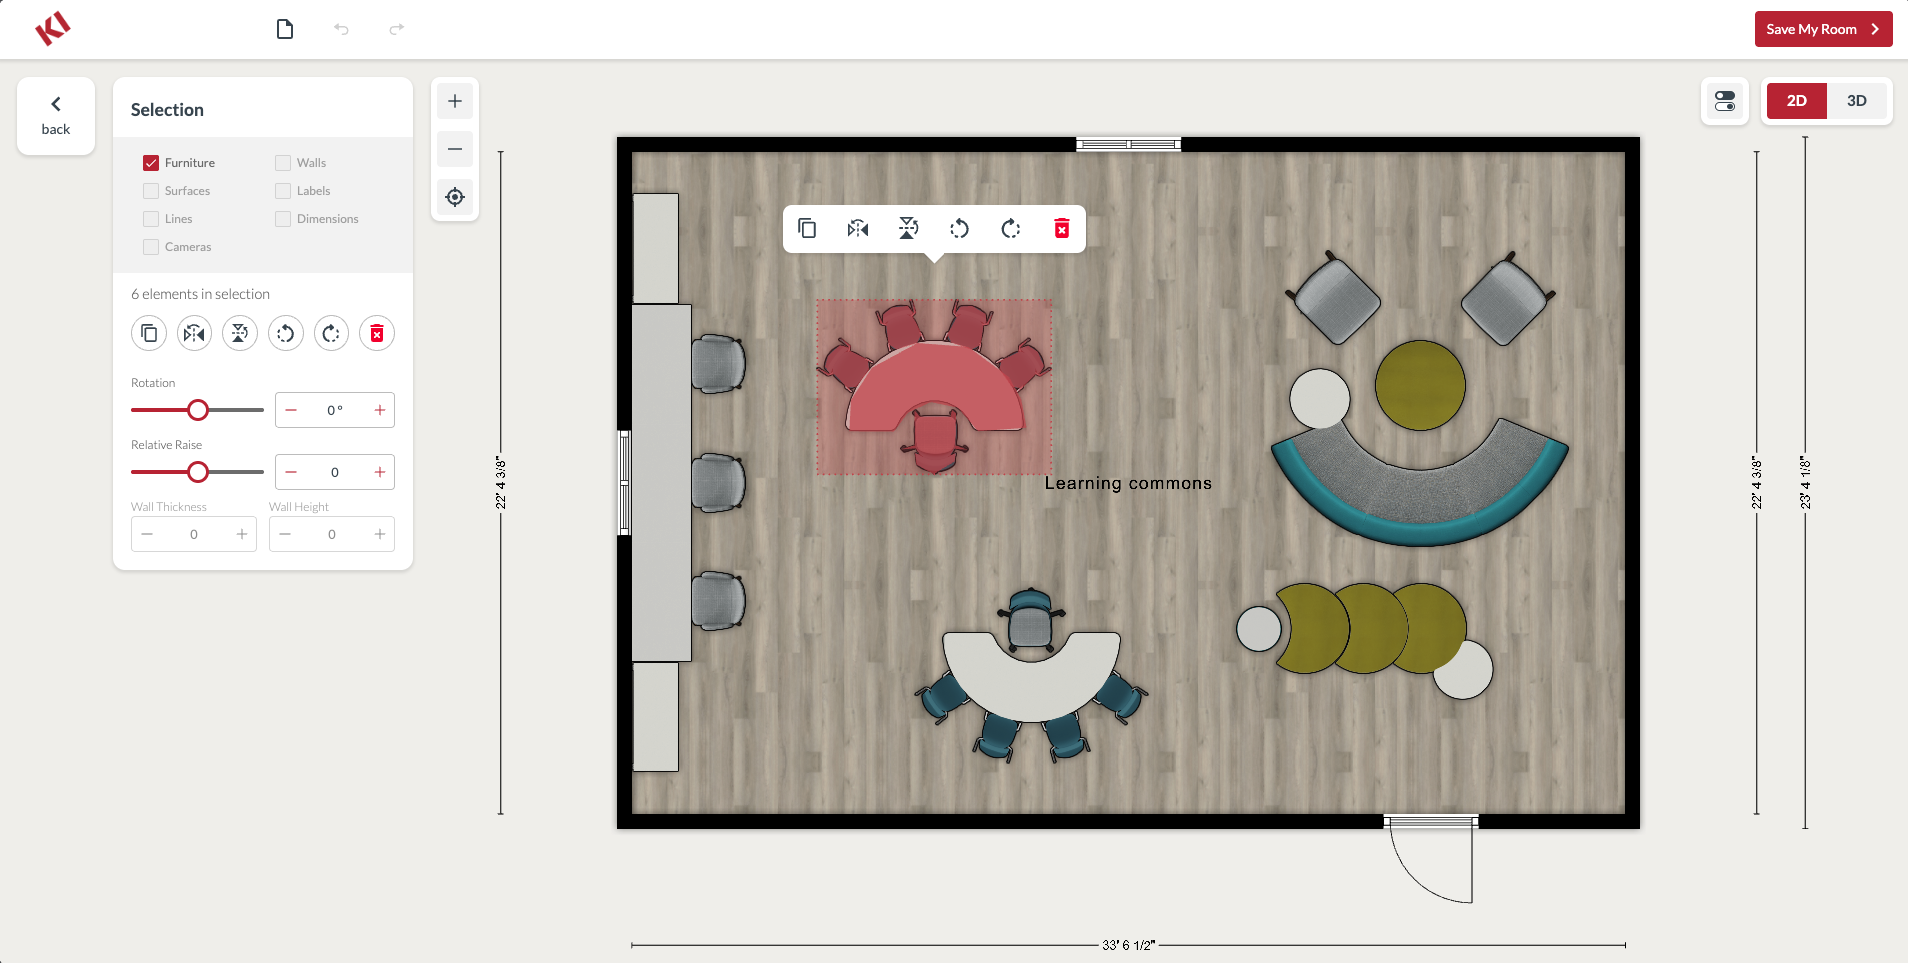
- Rearrange elements. Click and drag any object to move it around the room. In the 2D view, you can also rotate, mirror, duplicate, or delete objects when clicking on them.
- Tip: Click and hold the Shift key to select and move multiple items at once.
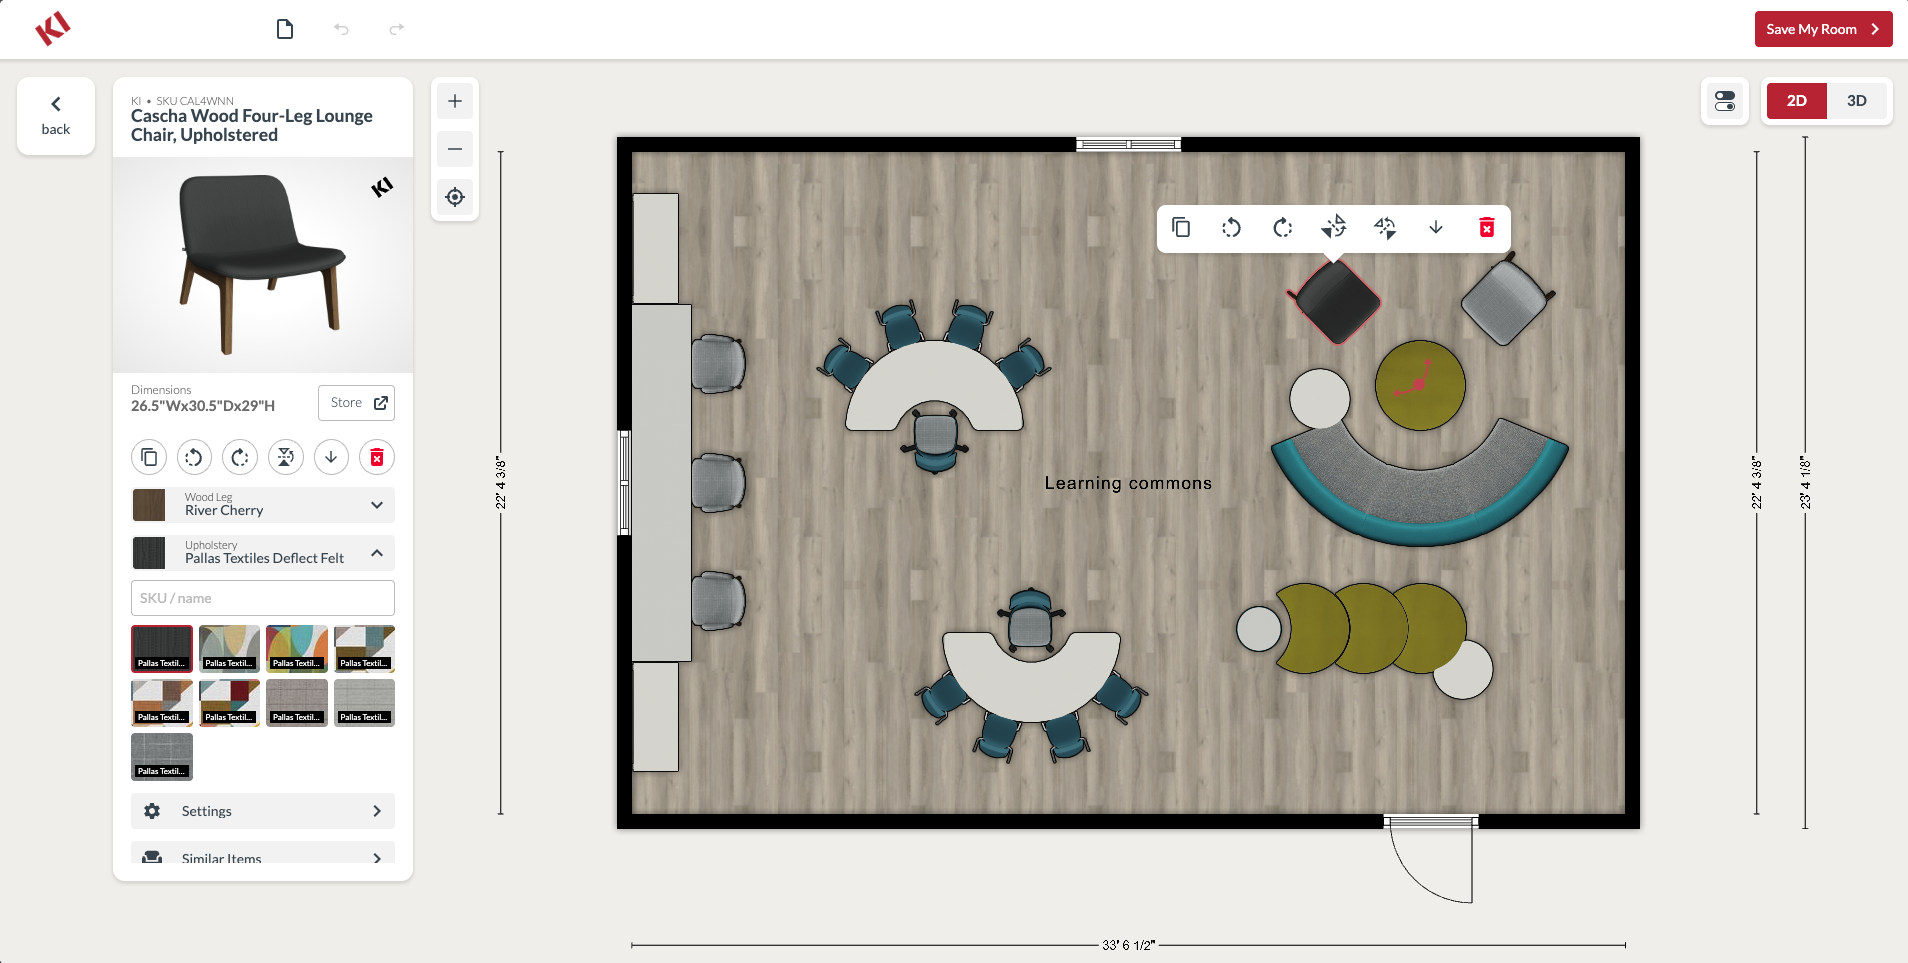
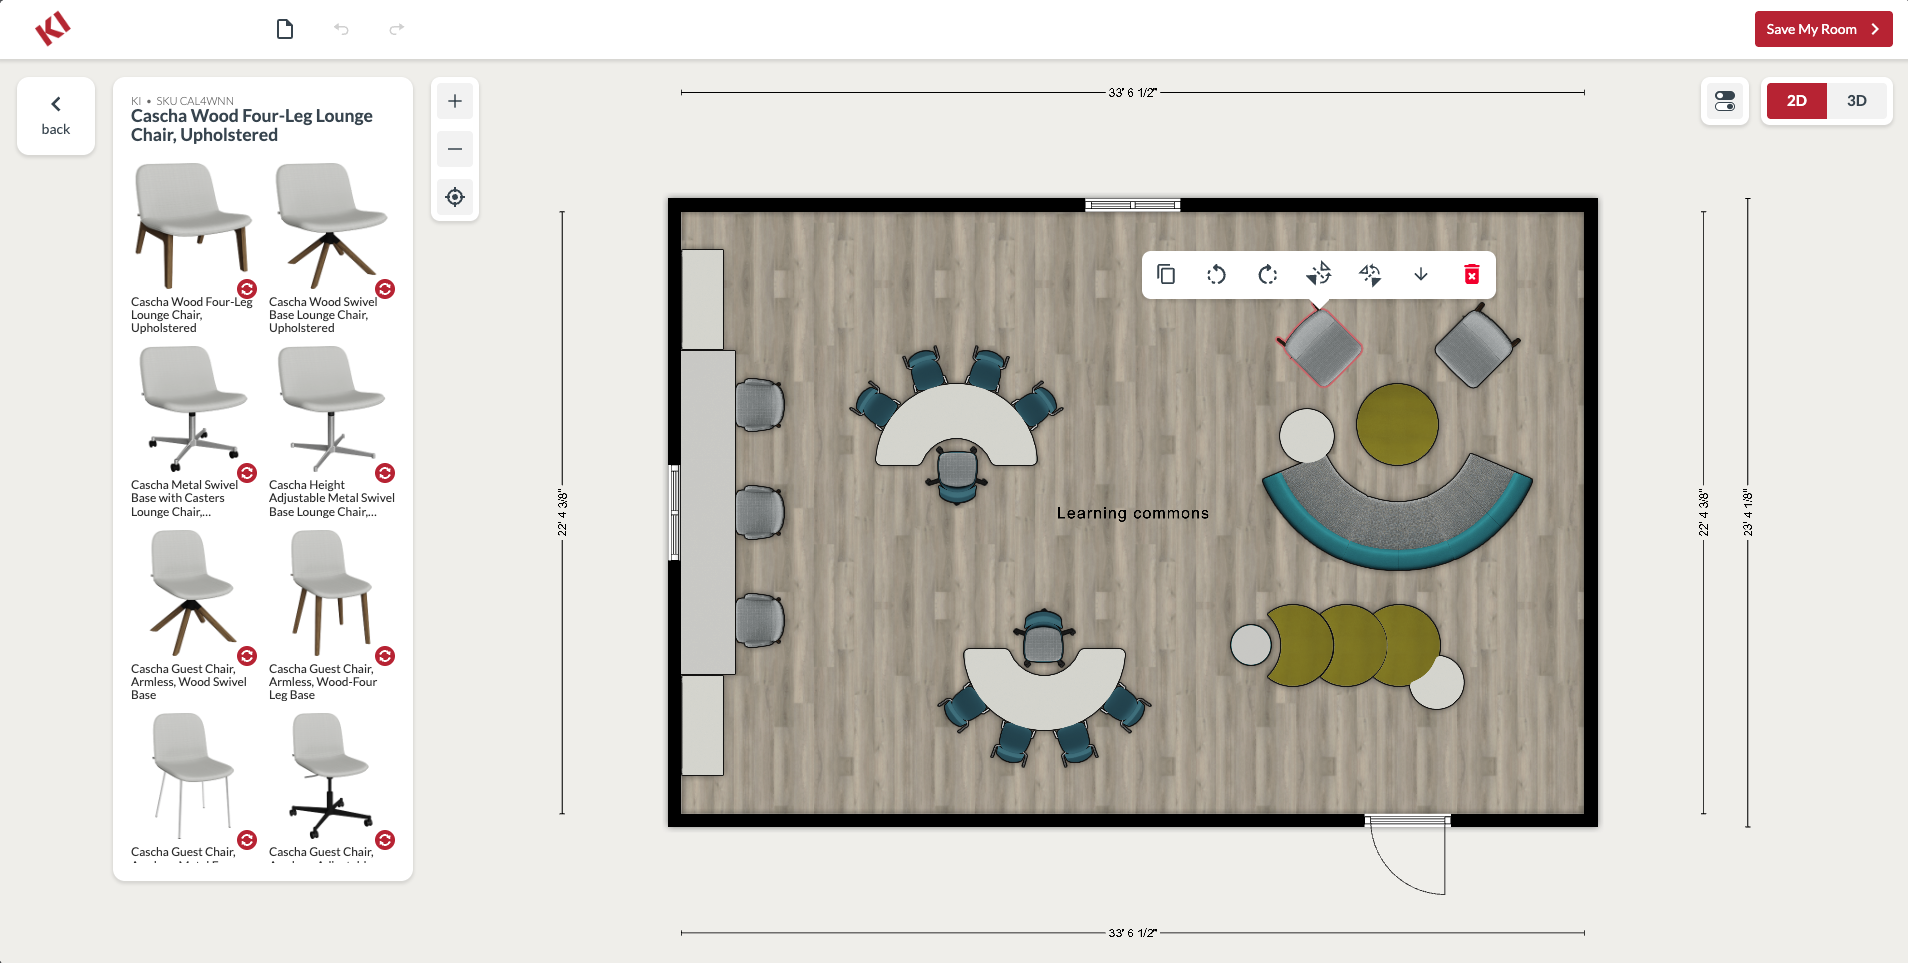
- Select or change options. When clicking on a piece of furniture in the 2D view, product details are shown in the left pane. See furniture dimensions, change fabrics and finishes, or even swap it out for another option by clicking Similar Products.
- Add furniture. In the 2D view, click the chair icon in the toolbar on the left-hand side. Look up furniture by color or keyword. Search known brands for accessories such as rugs, lamps, and computers. Click and drag these items into your room.
- Tip: Changing the first dropdown field to "All KI Categories" will show all of the products we have added to the tool.
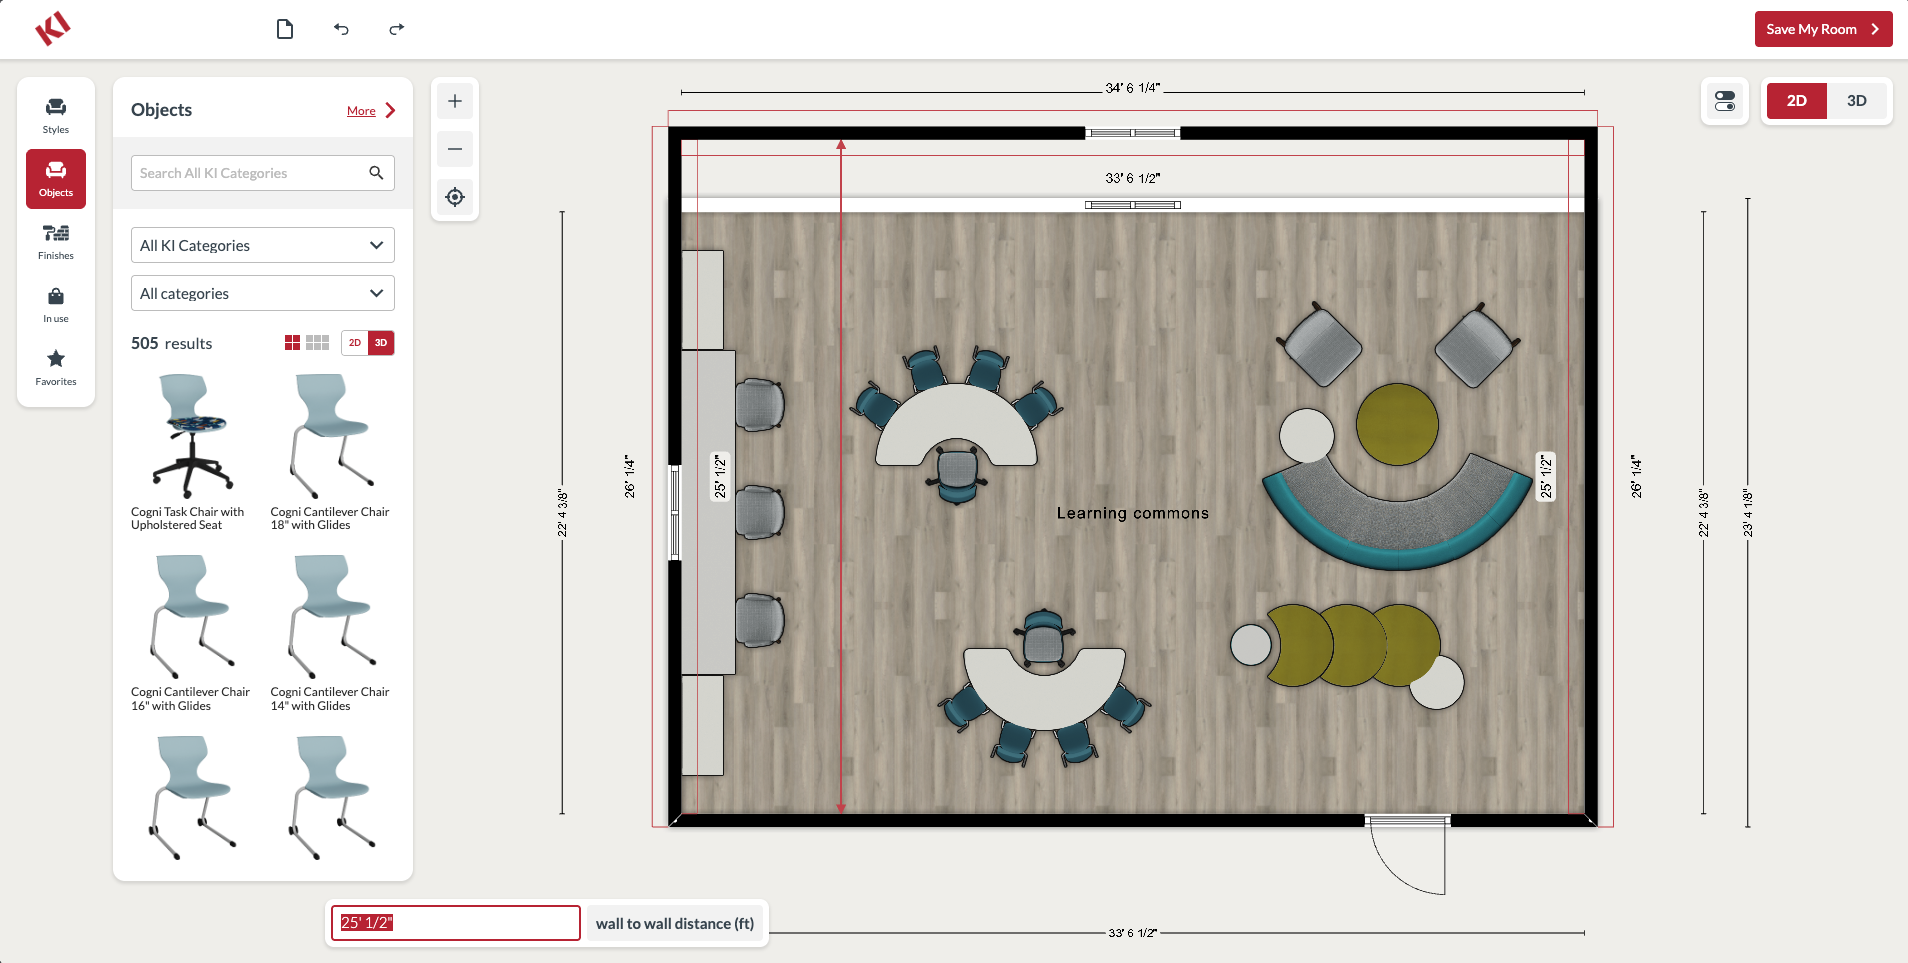
- Move walls. In the 2D view, click and drag any wall to change the dimensions of the room.
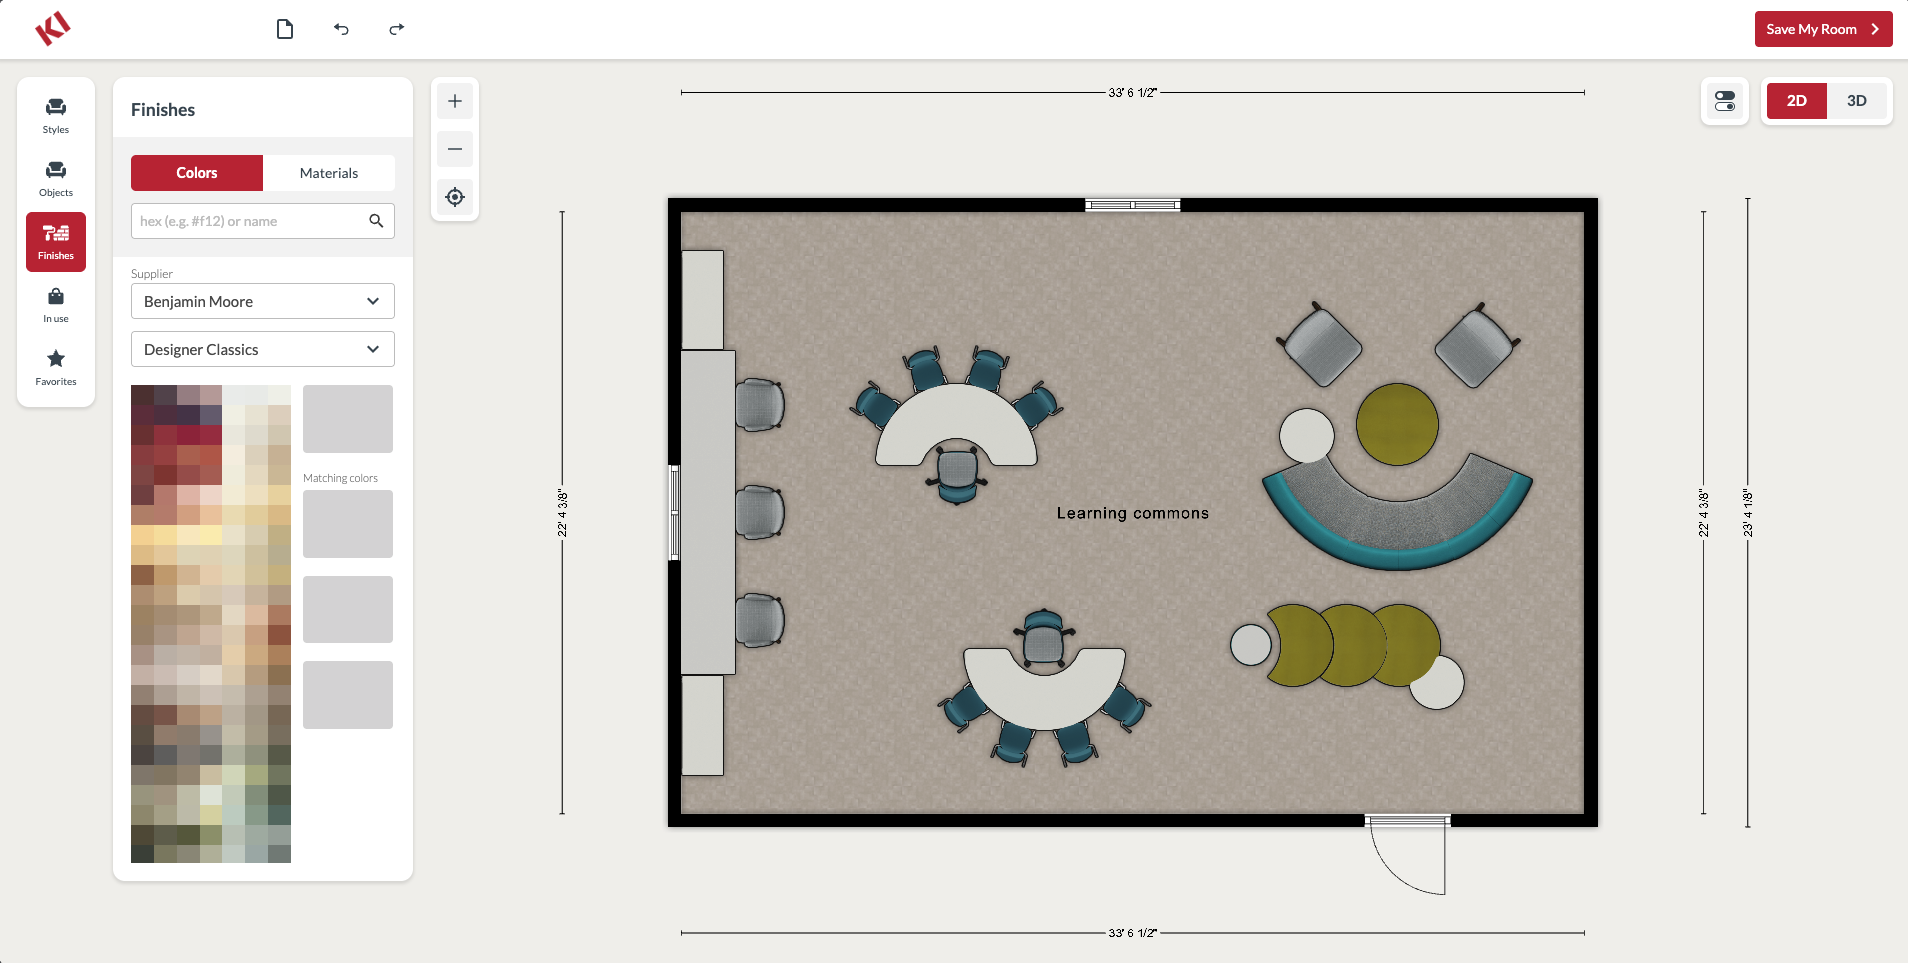
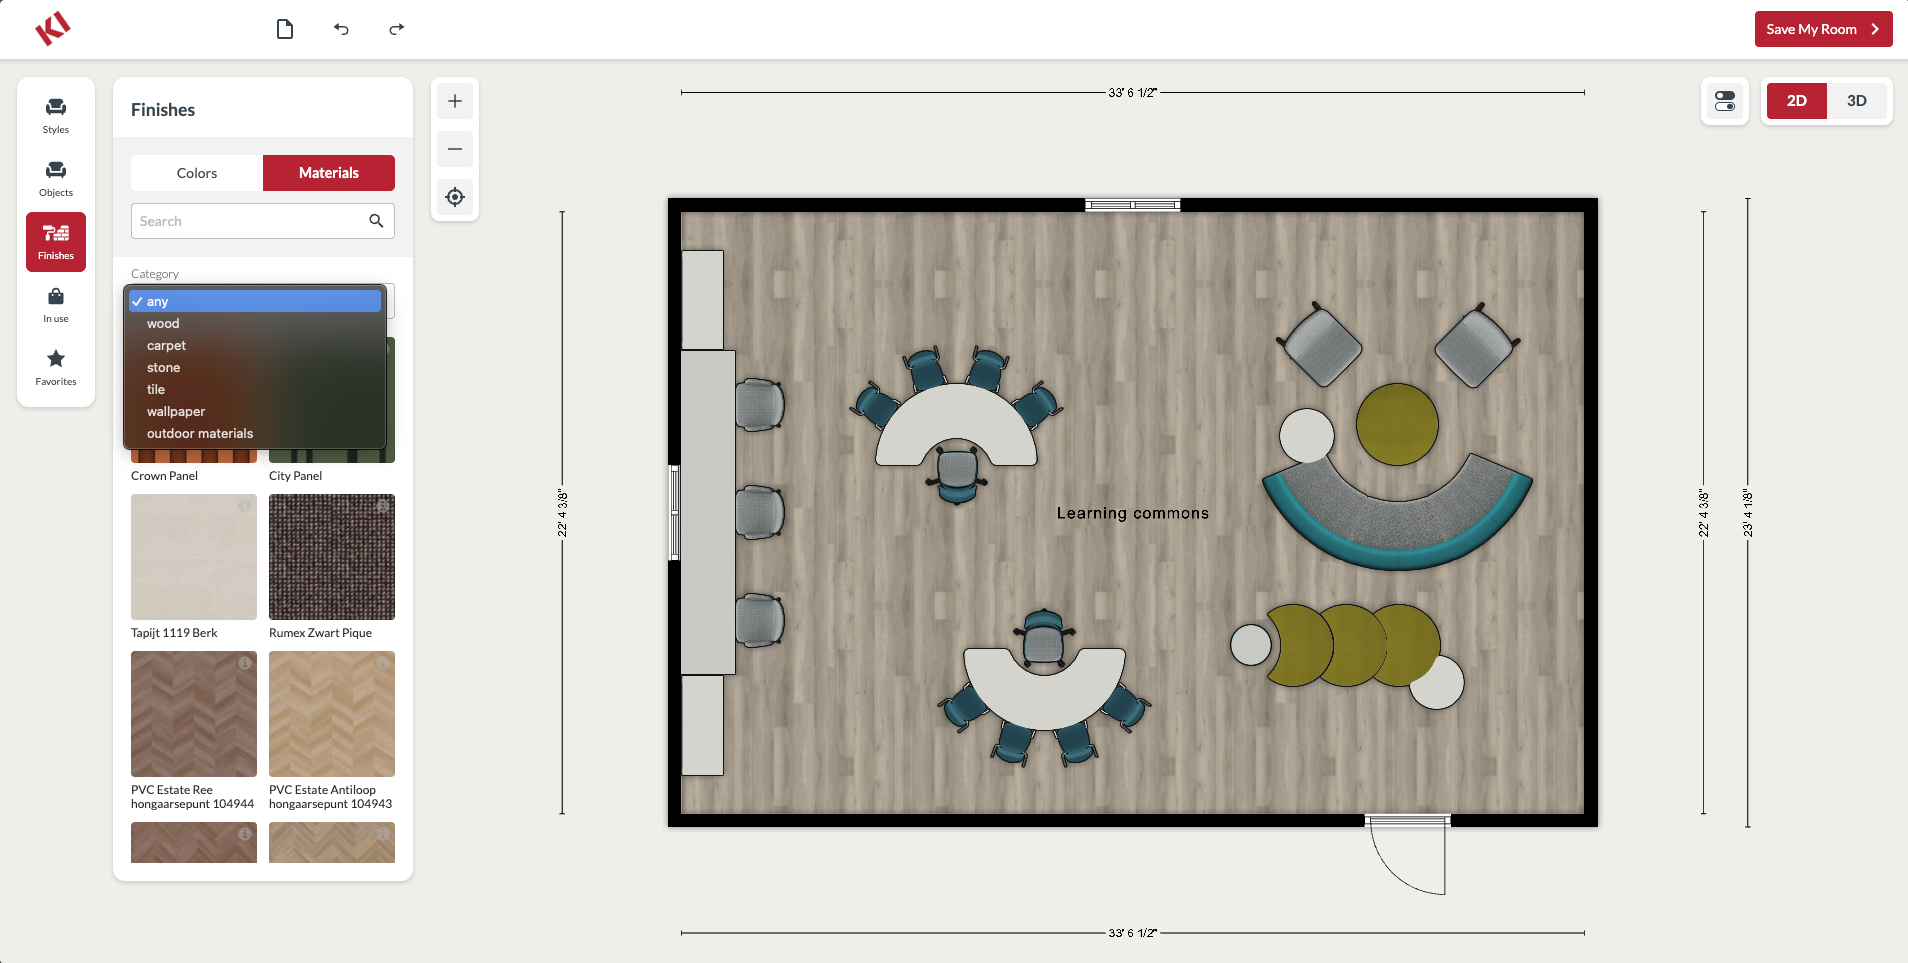
- Add carpet and paint. In the 2D view, click the paint roller icon in the toolbar to explore colors from Benjamin Moore®, Sherwin-Williams® and more. Click the brick wall icon to peruse wood, carpet, stone, wallpaper and other architectural materials. Once you’ve selected a color or material swatch, drag it to the wall or floor to apply it.
Step 3: View Your Classroom
Now that you’ve put the finishing touches on your design, take a moment to admire your classroom floorplan.
- Review inventory. In the 2D view, click the shopping bag icon in the toolbar to see an overview of products in your classroom. Download an Excel file with the details.
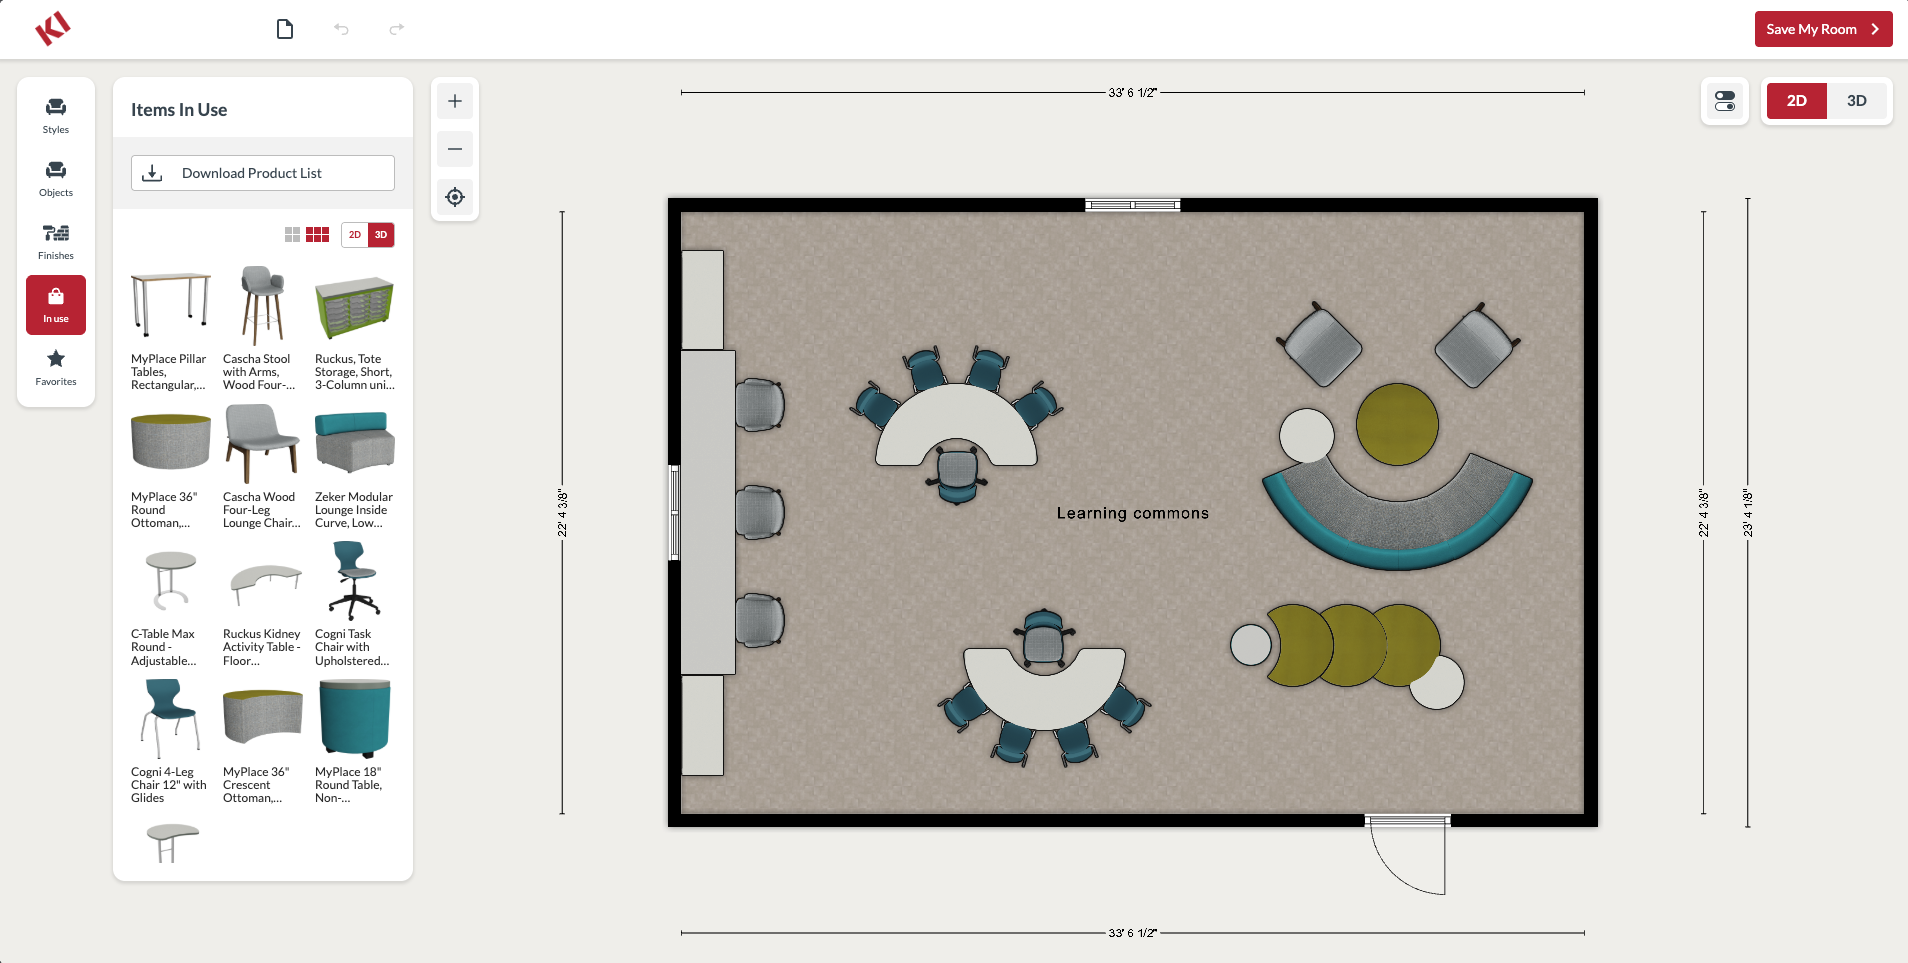
- Toggle between 2D and 3D view. In the upper right corner, toggle between a 2D bird’s-eye view and a 3D rendering. The 3D option includes an aerial view as well as a walkthrough view at eye level. Click and drag your 3D classroom design to view it from different angles.
- Tip: Click the toggle icon to fine-tune your view, toggling doors, shadows, ceilings, and more.

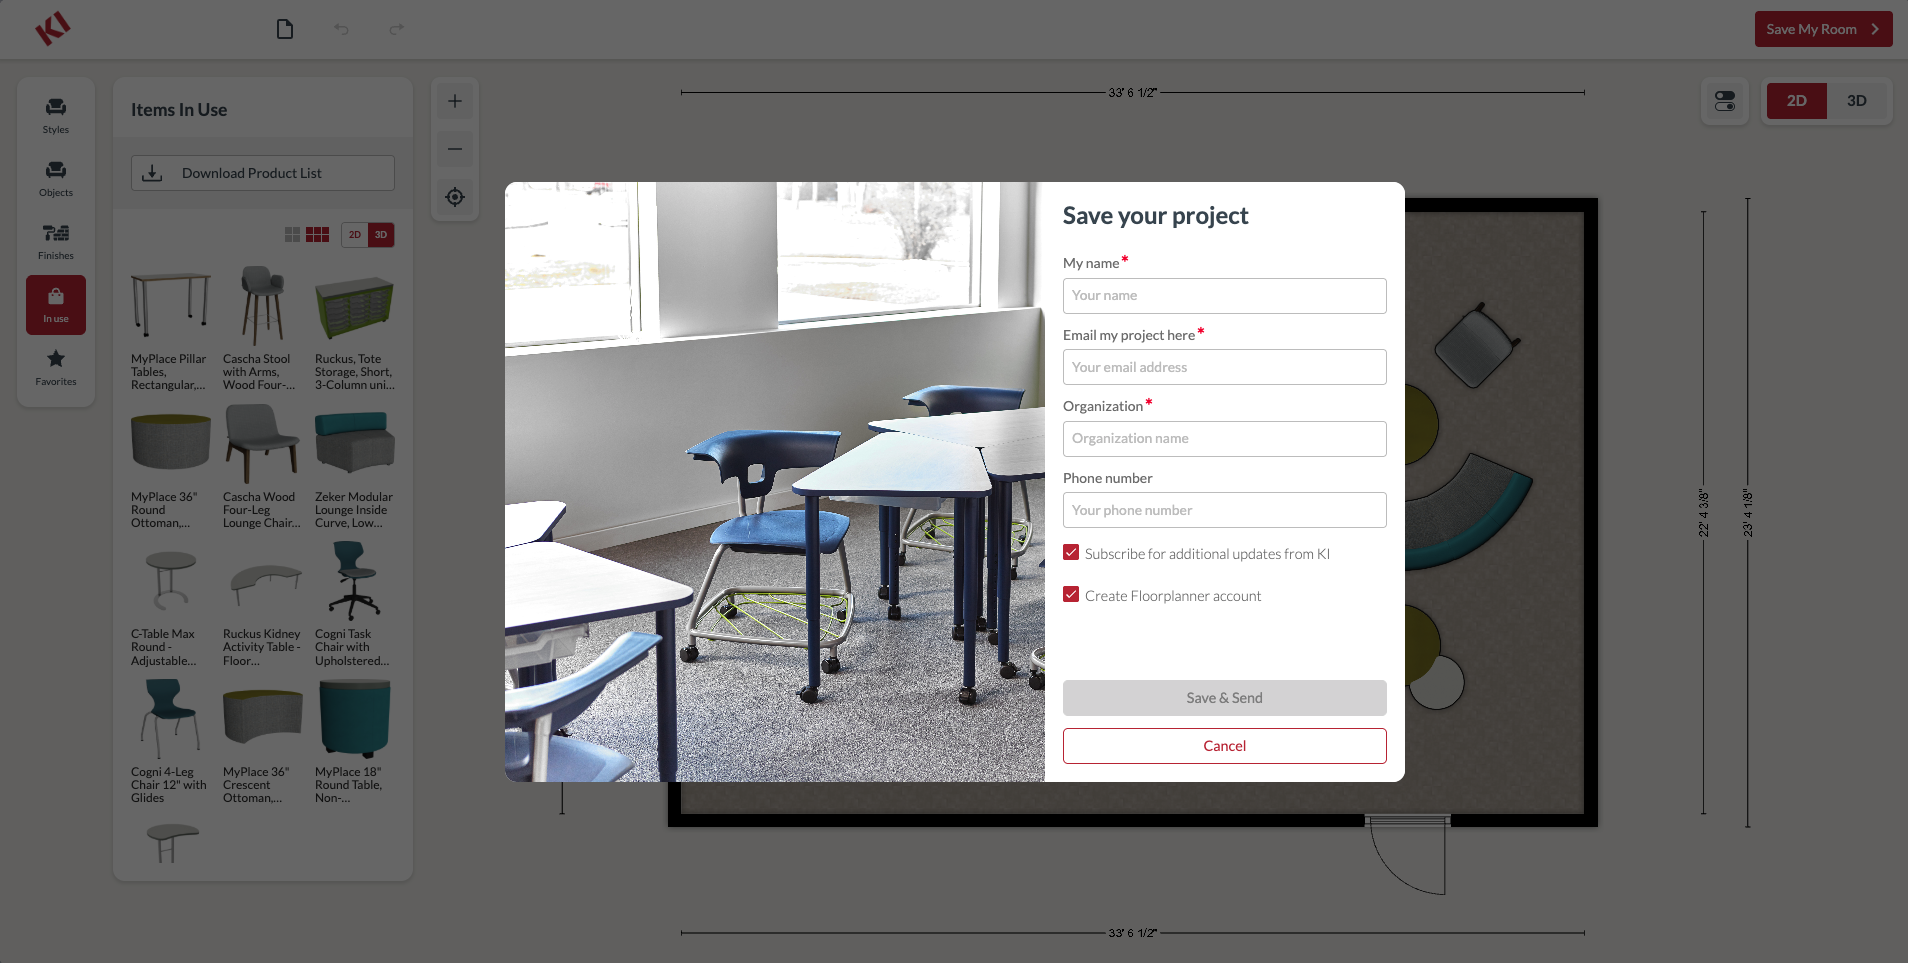
Step 4: Save Your Design
Once you've completed your ideal learning space, make sure to save it for future reference. Select the Save My Room button in the top right corner to send yourself an email with the final visual of your design and the product list.
- Subscribe to receive updates from us about new products and design tips.
- Create a Floorplanner account to be able to update your design later and manage multiple layout projects in the same spot.
Our team is pleased to provide a photo-realistic render of your classroom floorplan upon request. Simply forward your masterpiece to classroomplanner@ki.com and a team member will reply with your enhanced image.
Step 5: Unlock Access to Our Education Experts
Classroom Planner not only gives K-12 and higher education teachers, students and school administrators more ownership of their learning environments, but also provides an excellent way to collaborate with our team. Consult your dedicated KI sales specialist or dealer partner on your ideas and discuss ways to support your specific instructional style and methods.
We're excited for you to explore this tool! Share your designs with us on Instagram (@KIfurniture), LinkedIn (@KI), or Facebook (@KIfurniture). We look forward to collaborating with you and discovering your unique learning culture.
Get Started in Classroom Planner